10 Shoe Rack Designs to Build a Bench at Home w/ Guide
With a growing family, you need some extra storage space for everything whether it’s shoes, clothes, or any other stuff. You can carelessly make a bundle of clothes and throw them in a cupboard and shut the door at them but what about shoes?
Shoes need a proper space otherwise you won’t like guests stumbling over your shoes. There are a variety of ways by which you can organize shoes and store them to save them from dust and reshaping.
Before checking designs, first, check shoe storage ideas so you can select how your design should be. The list of best shoe rack designs is as follows.
Best Shoe Rack Designs
1. Double Storage Shoe Rack
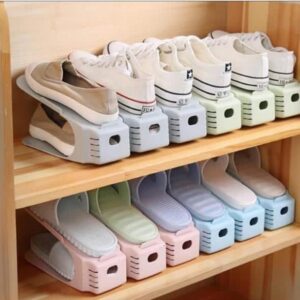
This is designed to give you drawers look on one side and display shelves on the other side. You can use the drawers for storing the shoes and can place decoration pieces on the display shelves if you want otherwise you can also lace shoes on these shelves but then consider placing this unit in your dressing room. This unit increases the beauty of your home while not letting anyone know what you are hiding inside drawers. It’s a bit expensive but undoubtedly enhances the beauty of your house.
2. Folding Shoe Rack
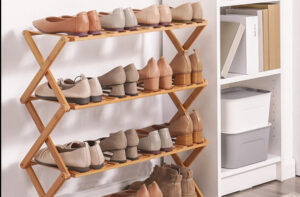
If you have a limited collection of shoes then this option is for you. It is budget-friendly and portable. You can place this anywhere in the house but I recommend placing it somewhere at the corner where nobody can directly see it. If every shoe is busy then you can also fold it and place it under the bed or in the cupboard.
3. Storage Boxes
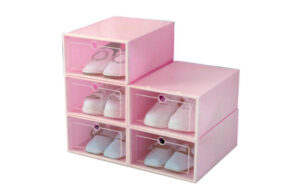
If you have enough space under your bed then you should definitely consider storage boxes. Some storage boxes come with sections or compartments. You can arrange your shoes in the storage boxes and hide them under the bed. When you want a pair of shoes just drag the storage box from the corner, open the zip and take out the pair you want and drag the box back under the bed. It is easy, cheap, and portable.
4. Shoe Holder
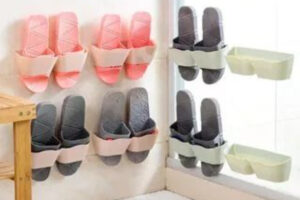
If you have a space for shoes in your cabinet then you should definitely try a shoe holder as it leaves the space for more shoes or you may say it doubles the area. One shoe over the other makes a selection easy when you are in a hurry for the occasion and you have to pick a matching pair. It is the affordable and best way to organize your cupboard in reference to space.
5. Understairs
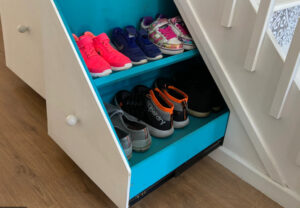
If you have stairs in your house then you can utilize the area below the stairs. This is one of my favorite places which is huge and can be utilized in any manner. But sticking to the topic I recommend that this area can be made into a shoe storage area. You can hide shoe racks over here or can place wooden shelves and make your own shoe rack.
6. Bench Shoe Rack
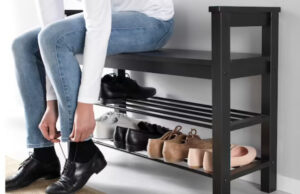
The bench shoe rack performs dual functions, one for sitting and the other for storing shoes. You don’t need to find a specific corner to fit this as this looks like a part of the furniture. You will realize it’s not expensive if you see from this aspect that it’s a bench in your living room and you are utilizing its useless part by placing your shoes in it. You can do one more thing, place the bench in such a way that from the front it seems like a bench but when you rotate it there are shelves or compartments for shoes.
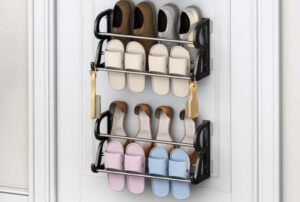
7. Over the Door Shoe Organizer
This idea works with any door in the house, but it really works great if you have a store in your apartment. You just have to hang this rack over the backside of the door. The hanging rack is convenient for small spaces and is affordable. It doesn’t accumulate larger shoes but works great for small and average-sized shoes.
8. Shoe Storage in Ottoman
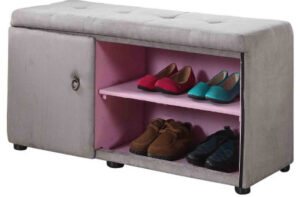
This is the best idea I have ever come across. Ottoman increases the beauty of your living room while the hollow space inside it can be utilized by placing pairs of shoes. You can even create compartments inside the ottoman to place shoes in an organized manner. There is just one flaw, it wouldn’t store large shoes, like boots, if you create compartments inside it.
9. Shoeboxes
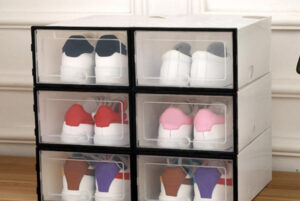
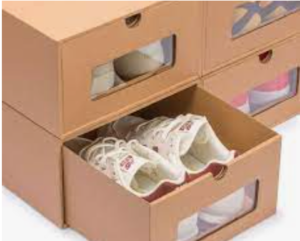
This option is best for people who have enough storage space but want to keep their pairs away from dust. These transparent shoe boxes help you find out your desired shoe at one glance. Even if you don’t have enough space for storage then you can consider hiding these boxes under the bed.
10. Extending Shoe Rack
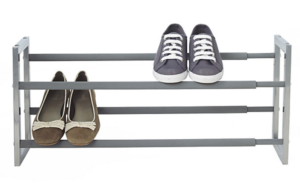
You already have a shoe rack but now it’s not enough for your tremendously increasing variety of shoes so instead of buying another rack it’s better that you try extending your existing rack. Place a metal or wooden shoe rack over the existing shoe rack and join it with the help of a velcro patch or with the help of screws to make it more strong. It’s better if you attach a plastic rack as it’s light in weight and would stay easily.
How To Build A Shoe Rack Bench?
Do you need a storage solution for your shoes? But you have no options available? Then you must not hesitate to follow this fantastic DIY shoe rack bench. In this article, you will find all the great ideas to build your shoe rack and give it your style. Moreover, it will be the most rewarding thing to put out and benefit from. For me, this shoe rack bench has always been valuable and worth the time and money spent.
It works wonders in a confined space and makes cleaning easy. But it would be best if you stay calm and focused while handling all the tools and materials. Thus, finding a convenient DIY isn’t impossible. Therefore, I am offering you the best option available for your mudrooms and entryways. So, make yourself proud by adding this DIY project to your home. Let’s not wait and get started!
Step 1
Get All Your Tools And Material Set
To build a DIY shoe rack bench, you need the following tools and materials to get started:
Tools Required
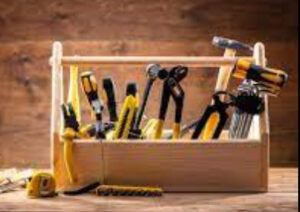
- Drill
- Pocket hole screw
- Measuring tape
- Table saw
- Orbital sander
Material Required
- Wood glue paint( any color of your choice)
- Clear satin varnish
- Single top plywood board
- 1 baseboard
- 1 backboard
- 2 sideboards
- 2 middle section board
- 4 legs
Step 2
Measure The Area
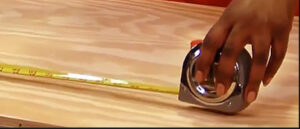
Before building the DIY shoe rack bench, you have to measure the area to keep it. Measuring the space is the key to making the shoe rack bench perfect. Therefore, you need tape to measure the length and width accordingly. Once you are done measuring, you can easily cut the top, base, side, and middle section boards according to the measured sizes. Try to use boards that are straight and not twisted.
Moreover, you can also find these wooden boards accessible at your local hardware store in various sizes. This way, you will get the demanded panel length for your shoe rack. When you are done with this step, you won’t have any problem assembling the boards.
Step 3
Sand All Boards
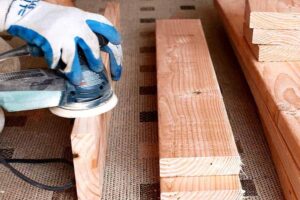
Do take all the cut boards and sand them with the help of a random orbital sander. It removes all the scratches from the wood, making the cuts flawless and even. Therefore, you should always sand the board separately on the workbench before everything is assembled. Hence, you won’t need to detach the pieces to rectify the cutouts later.
Step 4
Start Building
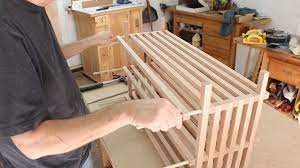
The side of the shoe rack bench has an altered frame and panel construction. Once you are done measuring and cutting, assemble the boards to make the perfect DIY shoe rack bench. Firstly, take the measured baseboard and start attaching the legs on each corner with the help of wood glue. Then, nail the joints with the pocket hole screw. This way, the joint will remain tight and firm.
When you are done putting the legs to the base, you must attach the sideboard to the bottom. After fixing the sideboards, you should keep the frame in the standing position to join the top board to the side boards to create the bench’s edge. Hence, the body is built, and now you can easily affix the backboard of the shoe rack.
After having all this done, you can now easily attach the middle section board to the space inside the shoe rack box with the help of pocket hole screws. This board will act as a divider in the compartment and make 2 spacious rows for your shoes. Isn’t it spacious to keep all your pair of shoes? Depending on the size you have saved for your shoe rack bench, you can also add up more shelves. The middle boards can also be attached to the frame before the top panel to avoid any problems later.
Step 5
Paint The DIY Shoe Rack Bench
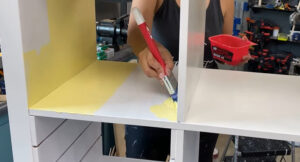
Now that we have the correct sizes of the boards connected. It’s time to paint the shoe rack bench. For this purpose, you must get the color you want and start painting the rack. You can also use separate colors for the inner and outer portions of the frame, making it look fancy. Besides that, you can only use clear satin varnish to keep the natural wooden look to the shoe rack.
Step 6
Decorate The Shoe Rack Bench
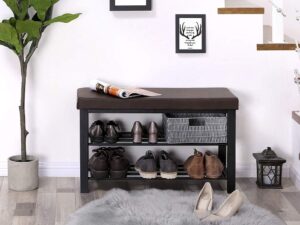
After completing the DIY shoe rack, place it in the entryway, bedroom, or any of your favorite places. Moreover, you can keep all your shoes in the shoe rack. You can place a small pillow on the bench or a basket and extra materials for decoration. Besides that, you can also keep a flower vase and some photo frames on top of it. Therefore, you will have an eye-catching shoe rack bench that will make your place look clean-cut. Easy as it is!
FAQs
What are the easy steps to make a DIY shoe rack bench?
The easiest way to make a shoe rack bench is to cut the plywood according to the shape and size. With the help of wood glue, attach all the joints to make the required shape and then nail the joints. Once you have completed the whole frame of the shoe rack bench, you can now paint it. Hence, you will get your DIY shoe rack bench in a go!
How much weight can a shoe rack bench hold?
A shoe rack bench holds up an impressive 260lbs ( 117.9kgs). These shoe racks are usually made up of bamboo material or plywood, which maximizes steadiness, and you can easily sit on top of it for a long duration. Besides that, if you try to buy cheap shoe rack benches, then remember, they won’t last long and will be unable to bear heavyweight.
Why should I buy a shoe rack bench?
Some of your shoes are very expensive, and they need proper storage to keep them safe. A shoe rack bench is the best option you can opt for. It is sizeable, and you can keep all your shoes neatly arranged. Moreover, they protect your shoes from dust and debris. Therefore, you must buy it or easily make a DIY shoe rack bench at home.
How To Make Shoe Rack at Home? (Out of Home Materials)
How many pairs of shoes do you have? A whole heap? You must need a shoe rack that keeps all your shoes organized without making a mess. The easiest way is to make a DIY shoe rack at home. These shoe racks will simplify your life, by keeping your shoes safe from damage. Moreover, they will not only work as a shoe rack but also doubles as shelving to place a mirror and your favorite candles.
Everyone loves a good organizing project, and these are unquestionably ones to consider. If you have tons of shoes lying across the space, next to the front door, you need to look at these. With the help of this article, you will learn how to make a shoe rack yourself at home.
If you are interested in ready-made racks, then wooden racks will suit you better.
Moreover, you will have your shoes assembled and they will be esthetically pleasing. I found 7 flashy shoe racks that you can make in just one day. Let’s get started!

1. Using Baskets/Totes
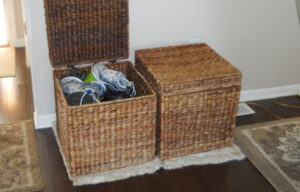
This is one of the simplest ways to make a shoe rack at home. All you need is 3 to 4 baskets of your own choice and color. Place these baskets under the entryway bench or, you can keep them beside the door of your bedroom. Hence, you can easily store all your shoes in these baskets.
Along with that, you can also use storage totes. One of the amazing things you can do with these baskets is, to add names to them. This way every individual will keep their shoes in their own plated name baskets.
2. Using Wooden Pegs
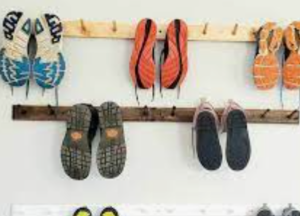
Making a shoe rack from pegs is one of the most convenient ways. It is designed in a way, that you can either hang it or place it inside your closet. It just needs a wooden board, measure it according to the space where you are going to hang the rack.
Now, take the wooden board and attach the pegs to it with the help of the glue or drill, at the same distances. Wait for the glue to dry out and then you can easily hang your shoes on the pegs. This is a great option for your kid’s shoe storage.
3. Using Cardboard
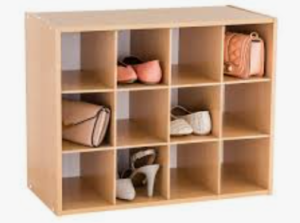
It is one of the inexpensive and easy ways to make a shoe rack from cardboard boxes. Just place the cardboard boxes on top of one another and glue them up. You can also paint these boxes, with your favorite color and make them look fancy.
This cardboard shoe rack saves you a lot of space because they are stacked upon one another. Moreover, this shoe rack can be placed in closets as well as in your bedroom.
4. Using Paint Buckets/Boxes
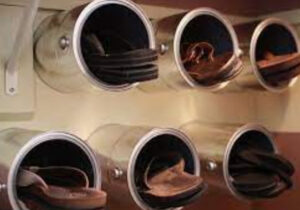
If you have extra paint buckets/boxes at home, then you can make a spacious shoe rack out of it. Hence, gather all the paint boxes, and wash them properly so that they are nice and clean. Then, paint the buckets or you can cover them with a nice printed paper of your choice.
Furthermore, attach them to the extra space on your wall and you can easily put your flip flops or flat shoes inside the buckets. This shoe rack is suitable for your bedroom as well as mudrooms.

5. Using a Ladder
You can make this shoe rack with a small and old ladder that you have at home, or you can make a ladder yourself. This ladder shoe rack, stores several pairs of shoes without consuming any space.
Hence, take the ladder and place it beside a wall, and put all your shoes on each rung of the ladder. This will give a very groovy look to your room. The ladder shoe rack is simple to store your shoes.
6. Using Wooden Packing Cases
These cases are easily available in the local thrift store, you won’t have to do anything more to them. Just take these cases, clean them up, and put them together in a standing position, to the wall for support.
These packing cases are similar to crates and have a lot of space to keep all your shoes. Moreover, paint them or else leave the wooden touch to them so that it looks more natural. This shoe rack is very elegant looking and won’t take a lot of space.
7. Using PVC Pipes
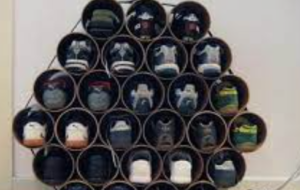
You can also make a shoe rack at home, from PVC pipes. These PVC pipes are available at the building material stores and are affordable. Hence, take these PVC pipes, cut them into the same sizes, and attach them to the wall or the extra space in your cupboard.
You can attach them to make beautiful designs and then you can store your shoes inside the pipes. This shoe rack makes a very distinctive design and they completely change the look of the room, after being painted.
FAQs
How do you make a wooden shoe rack at home?
It is very simple to make a wooden shoe rack at home. All you have to do is, take a few wooden boards and place them on top of one another, making shelves while keeping an equal distance between each wooden board. Fix these shelves to the wall or your cupboard and store your shoes in them. This wooden shoe rack is not expensive to make and is a lot roomier.
How do you make a homemade shoe rack?
You can make a homemade shoe rack easily from wooden crates, PVC pipes, cardboards, old ladders, and even empty paintboxes. These shoe racks are very convenient and easy to make. You won’t have to spend a lot of money, as they are easily found in a nearby thrift store, in just a few dollars. These shoe racks won’t damage your shoes.
How can I keep my shoes at home?
You can keep your shoes safe in various shoe racks at home. These shoes racks are sold in various furniture shops and you can also make a DIY shoe rack at home. Store the fancy shoes at the top of the shoes rack and flats in the door organizers. This will save you a lot of space and you will find your shoes easily while going out. Furthermore, use clear shoe boxes with lids to keep your shoes away from dust. You can also find shoe bins at any store, they are a lot spacious and you can keep them at home.
Conclusion
Choose any of the best shoe rack designs mentioned above that suits you to keep the hallway clean. Select shoe rack according to the space of your beautiful house and the number of shoes you have. To keep shoes clean and tidy it is better that you pick closed units but for frequently used shoes, racks are a better choice.

